BreadBoarding CY8CKIT-059
Cypress has a great platform: The CY8CKIT-059. On this board is a debugger and a PSOC 5LP device. It works well with Macintosh and VMWare. The version you purchase has to go through a firmware upgrade. It requires some dancing, however.
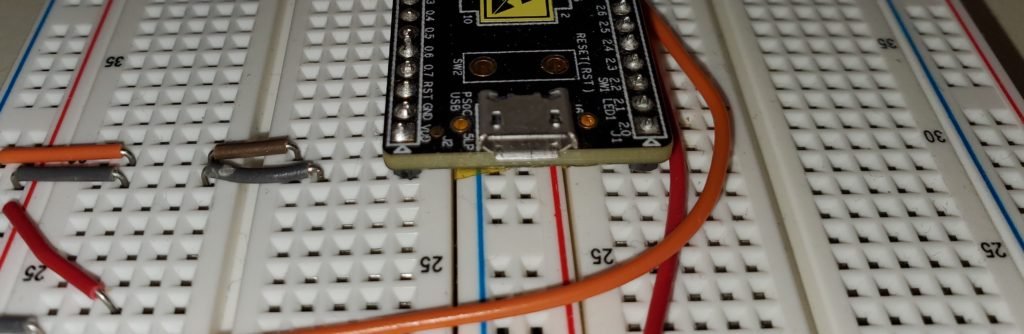
Once you have your project finished, you can break off the debugger tab and use it stand alone. At this point, you can solder 0.1 inch male header pins on the debugger stub and the main board, and connect them with a flat cable to continue to use the debugger. Once you do this, the KitProg USBUART is not useful, as the printed circuit board (PCB) wires from it to the UART pins on the main board have been severed.
The kit has two rows of pins on 0.1 inch centers. This is also the spacing for cheap breadboards available on the internet. In my first post, I gave a link for purchasing this kit. It is also available from Mouser.com and from Digikey.com. (You can register and use credit cards at both, but the price is higher than buying from Cypress directly, but delivery is faster.)
I use breadboards with the PSOC, which I have purchased in the past from Amazon. Here is a link for some breadboards: https://www.amazon.com/Breadboards-Solderless-Breadboard-Distribution-Connecting/dp/B07DL13RZH/ref=sr_1_3?dchild=1&keywords=breadboards&qid=1587740118&sr=8-3. I am not yet an amazon associate, so I don’t get revenues from this.
The CY8CKIT-059 is too wide to easily use with normal breadboard split row. You can plug it in and get one row of connector holes available on one side, and two rows on the other. However, if you remove the side bar from one of the breadboards (which has the red and blue striped connector rows on it) and join the two breadboards, you can make a breadboard that works well. Here is a picture of the joined board:
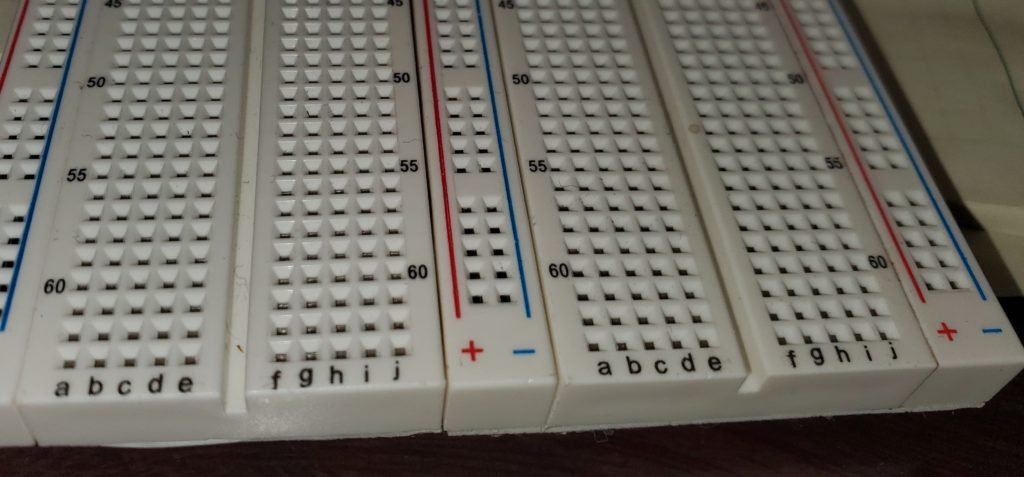
There is usually double sided tape underneath the breadboards. I cut out a rectangle of cardboard from a yellow notepad and stuck the breadboards to it. This gives a good foundation for plugging in your kit, as seen in the following photo:
This allows you access to 4 board connector holes on one side, and three on the other. It makes it much easier to test your projects and add components to them. Note the bridging on the left. I do that to keep wires fixed and not normally subject to “oops!” issues when probing signals with oscilloscopes.
The 0.1 inch strips can also be purchased from Amazon. The link for one kind is here: https://www.amazon.com/Header-Lystaii-Pin-Connector-Electronic/dp/B06ZZN8L9S/ref=sr_1_37?crid=S0QD7G90DKHF&dchild=1&keywords=0.1+pitch+connector&qid=1587741040&sprefix=0.1%22+connector%2Caps%2C169&sr=8-37. This is overkill in terms of quantity, but is extremely good in price. You can find higher quality connectors if you wish. To perform the search yourself, look for “male header pins.” To get a soldering iron kit, to do the soldering of the pins to your CY8CKIT-059, search for “soldering iron” on amazon. There are many choices.
Connecting Debugger to your Computer
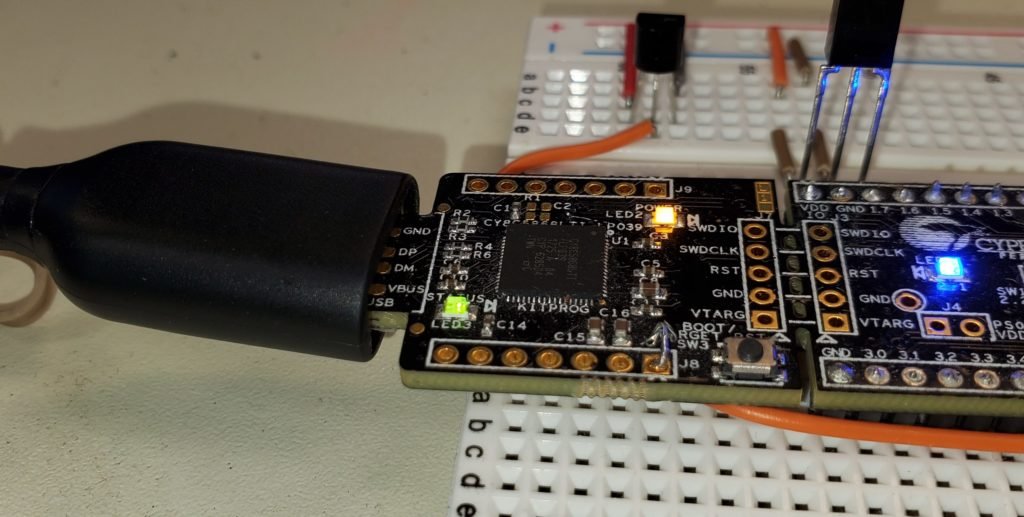
To attach to the “thumb” part of the debugger to your computer, it is best to use a USB extension cable. Search for “USB Extension Cable” on Amazon. Depending upon your computer situation, a 3 foot cable should work fine, as shown in this photo:
Macintosh, VMWare, PSoC Debugging
When using Virtual Machines to debug your projects, problems arise from time to time during the process. These problems are almost always related to USB. However, once you get used to the dance, it gets to be much easier, almost automatic.
In the following screen shot, you see the “Connect Cypress KitProg” as one of the menu items available for connecting to your Windows Virtual Machine (VM). You can select that, and be on your way:
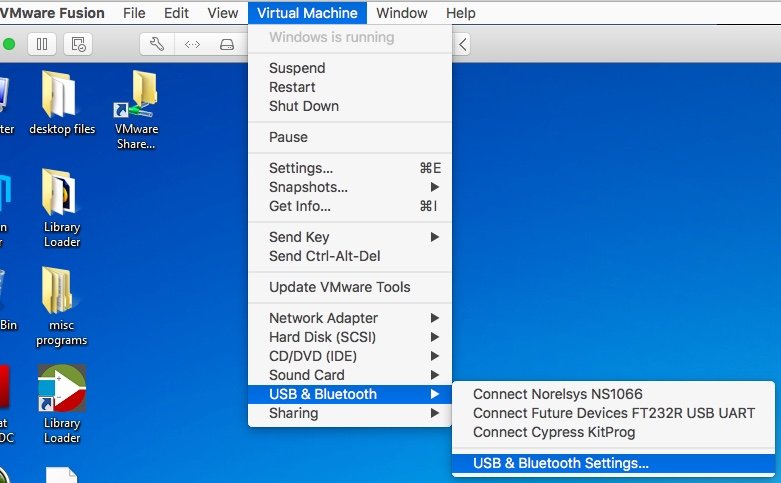
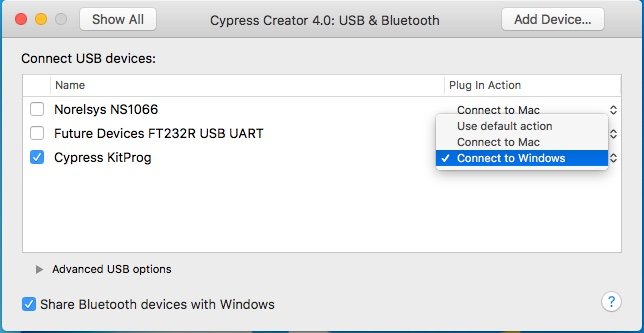
However, there is a better way to handle this for the future. Choose “USB & Bluetooth Settings…” as shown in the photo above. In the subsequent dialog, the Cypress KitProg is chosen and selected to auto-connect to windows. Note this only happens if windows is running when you plug the debugger in. If you start windows after it is plugged into the Macintosh, you have to connect it manually. Here is the selection:
Upgrading KitProg Firmware: Next Episode
In the next post, I cover upgrading the KitProg firmware under VMWare on the Macintosh. It is a fairly detailed post. In the meantime….
If you run PSOC Programmer to upgrade the KitProg firmware, you will find the KitProg will disconnect and the programmer will give up. At that point go to the USB menu as before, and connect the newly found “bootloader” to the windows machine, quit the programmer, and then restart the KitProg firmware upgrade. You may have to work through this process a couple of times to get the firmware upgraded, unplugging the KitProg from the USB and plugging it in again to restart. It is indeed a pain, but you only have to do it once in a while. Once finished, it will work fine from then on.
The C Language
Note that for the PSOC, software is generally written in C. I assume in this blog that you have enough knowledge of C to get by.
If not, and if you are a reader, the definitive definition of C is “K&R C.” You can search for “K&R C” under books on Amazon, and the authors of the C language will tell you all of its fine point. There are also many beginner books out there.
With the PSOC Creator IDE, a knowledge of C is required. Even if you are not an expert, you can get many things done with very little experience. The downside is, if you don’t understand the language very well, you can have problems that are hard to solve. That is because you don’t understand what the software is doing for (or to) you.
Finally
Experiment with a few projects. Load the example projects from PSOC Creator, and play.
Enjoy!
About The Author
W Maxfield
Firmware/hardware Engineer for too many years.
I typically use small breadboard cut in half:
https://community.cypress.com/message/231804#231804
The halves need some support, so a piece of the ABS plastic will do. Takes about 3 minutes to make a breadboard which provides 4 rows on either side. I solder round pins on both sides of the CY8CKIT-059 to make the kit easier to remove.
What I don’t like on the breadboards is that holes on the power rails are shifted by 1/2 row against the horizontal ones, which makes it hard to plug add-on boards as rows don’t coincide. I don’t know when it get started, but the bfeadboards manufactured in the US some 20 years ago had straight holes!
I agree with your comments and frustrations. The PSOC width is just not quite right, and I don’t like sawing if I can get away from it. That is why I join 2 breadboards at the power connectors as you see in the photo in the blogg. With a stiff piece of cardboard glued with double sided tape underneath, it also makes a stable platform, but probably not as stiff as yours.